
Start in 10 Minutes
If this is your first time using Aino LifeOS, do not start from an empty vault. The easiest path is to open the example vault first, try the three basic actions, and then decide whether to migrate your own notes.
The goal is simple: in 10 minutes, understand what Aino is for and create your first useful record.
After the example vault works, read Core Concepts all the way through. It is the key to understanding Aino LifeOS: pressure-free capture, then easy retrieval through theme tags and indexes.
1. Install Aino LifeOS
Check the Download page first. Use the official Desktop Pro release for your platform.
After downloading the installer, double-click it and follow the prompts.
If you want to understand the sample vault structure and .lifeos settings before installing, read Open the Example Vault first.
macOS may show an "unverified developer" warning on first launch. Go to System Settings → Privacy & Security and click "Open Anyway."
2. Open the example vault first
If terms like vault, PARA, and periodic notes are still new to you, do not configure your own system yet.
- Download and extract the LifeOS PARA example vault
- Launch Aino LifeOS
- Click the bottom-left folder icon, then choose "Open Existing Vault"
- Enter the extracted
LifeOS Pro/Example Vault/folder and selectLifeOS Pro PARA Vault
The example vault includes Aino's .lifeos/settings.json, so Aino can recognize the project, area, resource, periodic note, task, and template paths automatically. You do not need to configure these folders by hand.
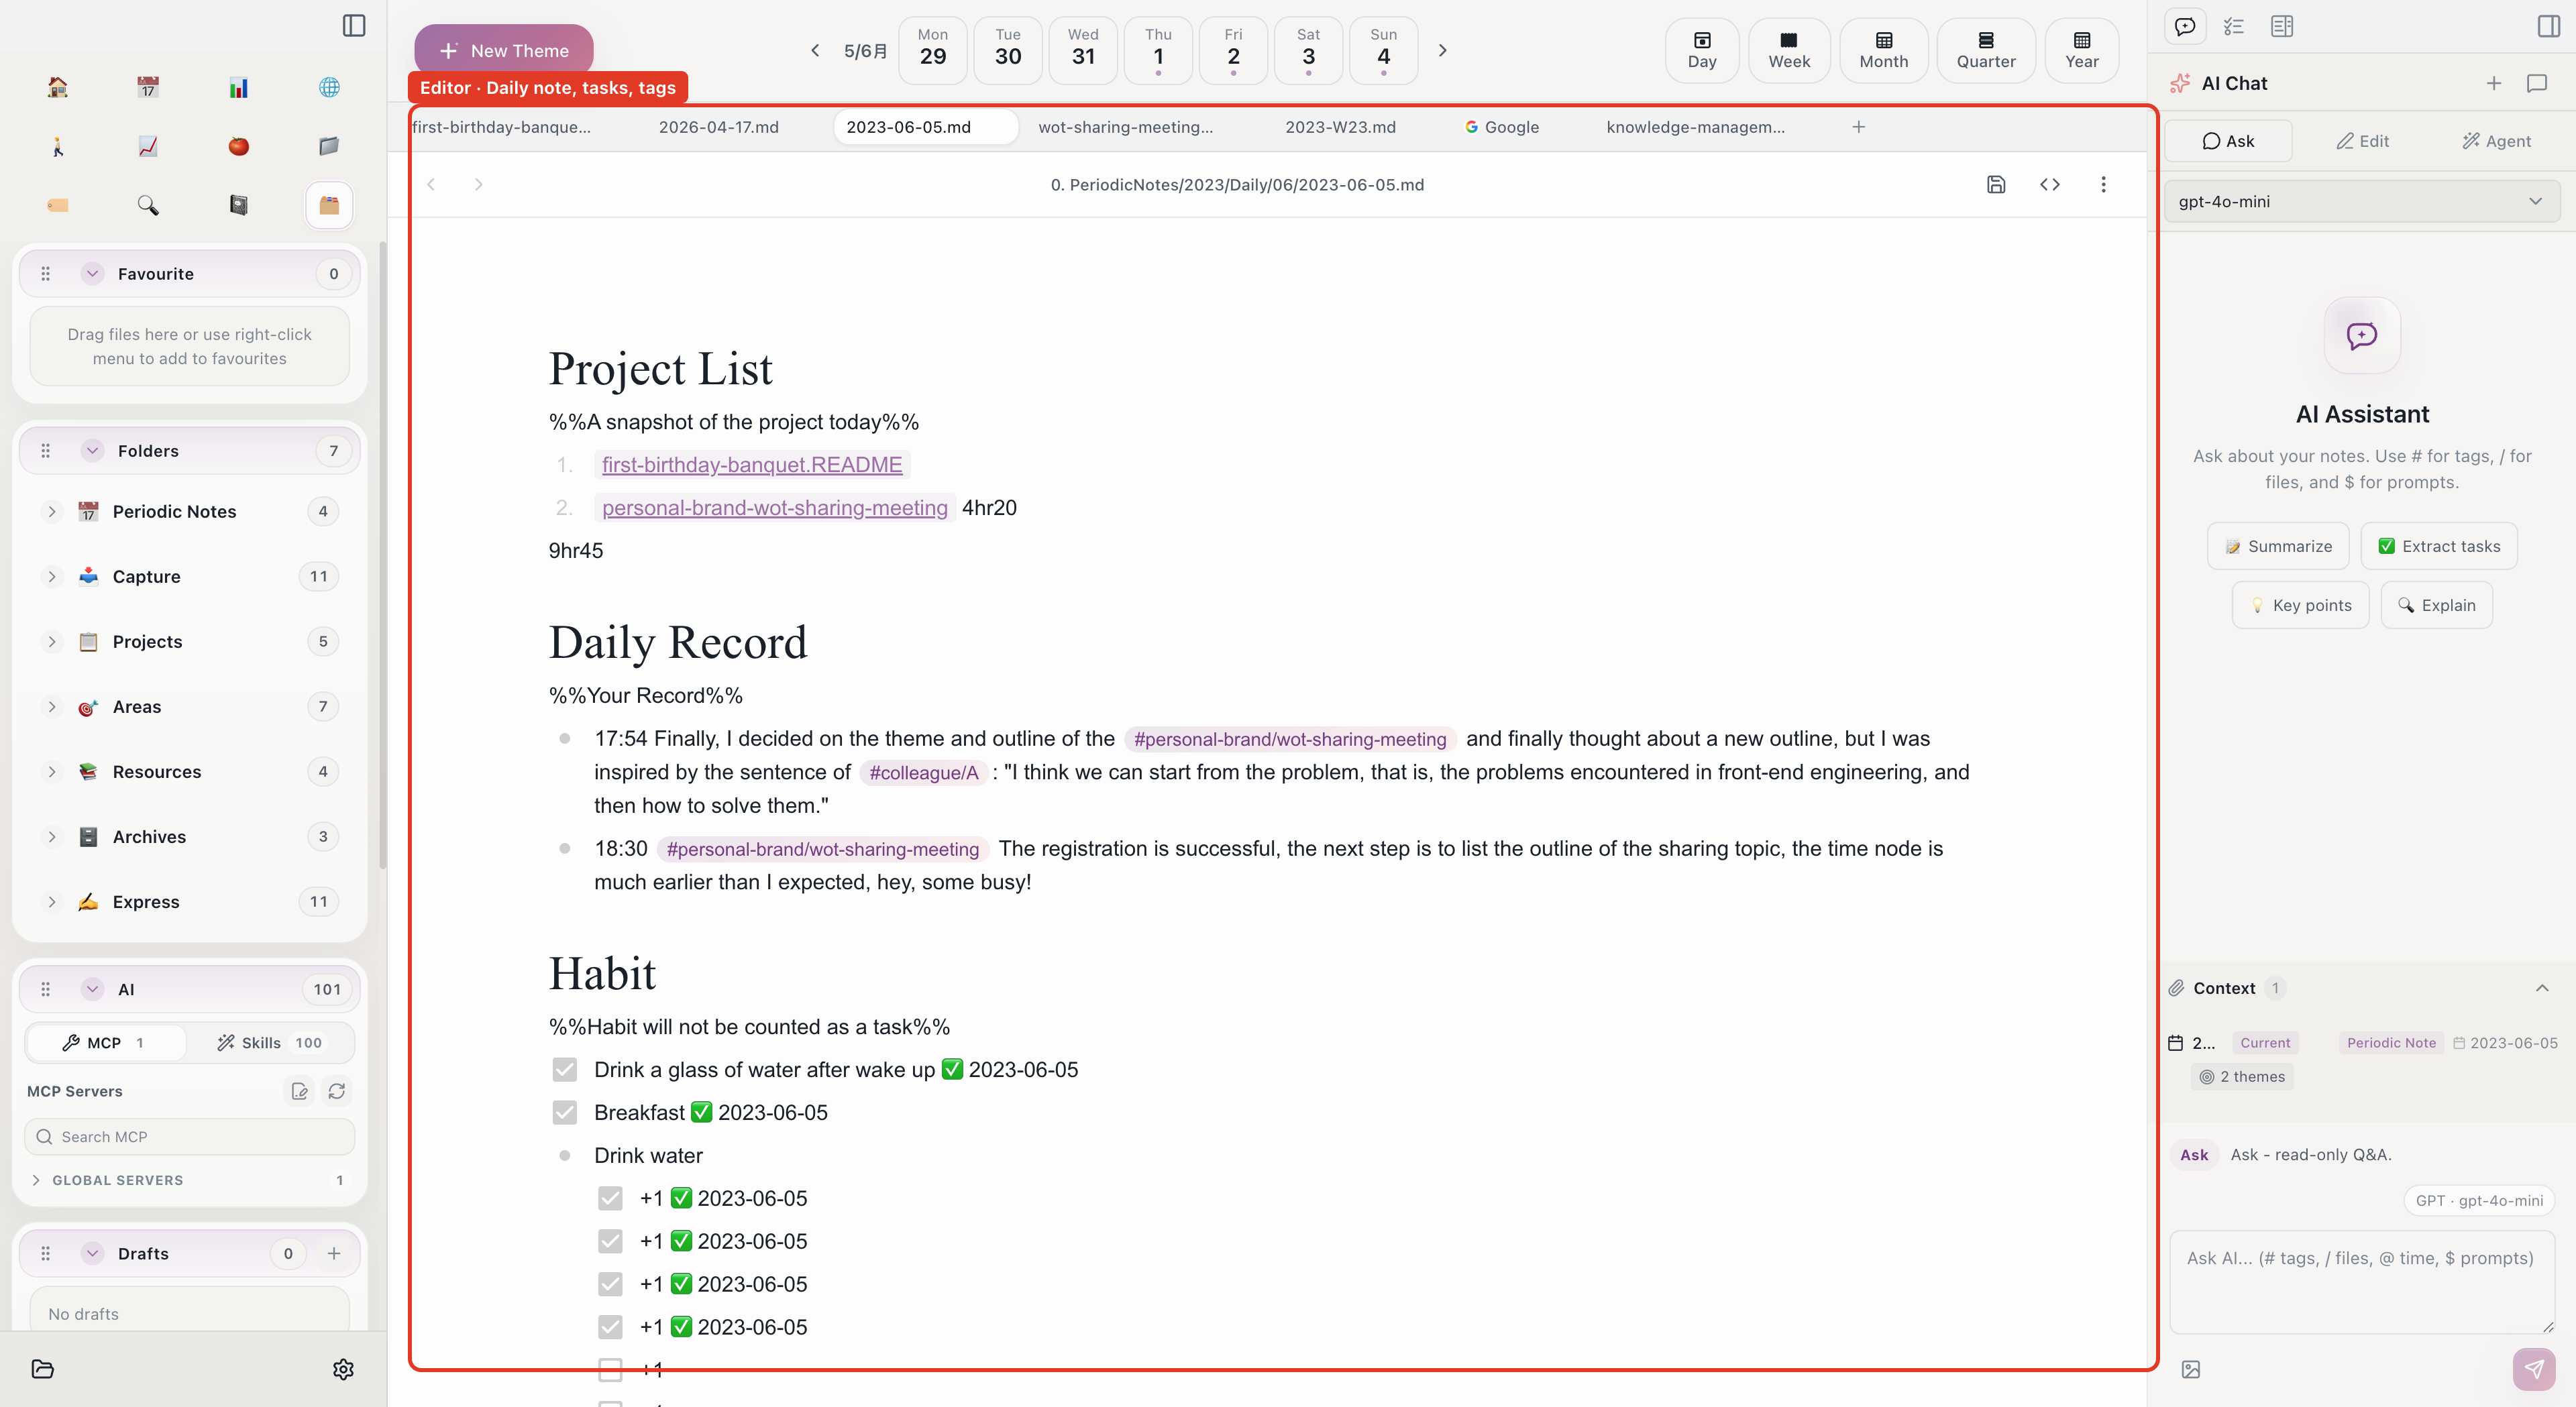
Left: file tree and tools. Center: editor. Right: outline, links, backlinks, AI, and tasks.
3. Complete three actions
Action 1: write a daily record
Click "Today's Daily Note" in the left sidebar. Under "Daily Record", add one line:
The daily note is your daily entry point. Temporary thoughts, meeting notes, tasks, Pomodoro records, and quick captures can all start here.
Action 2: create a task
In the same daily note, write:
Open the task panel on the right and confirm that the task appears. From now on, whenever you write - [ ] in any note, Aino can collect it into the task system.
Action 3: open a project note
In the file tree, open any project under 1. Projects/. You will see that a project note can collect related tasks, records, and files.
This is the core LifeOS pattern:
- Daily notes capture what happens today
- Projects, areas, and resources preserve long-term topics
- Tags connect daily records back to the right topic
4. Skip these settings for now
Beginners can skip:
- AI setup: Aino works as an editor, task manager, and calendar without an API key
- Calendar sync: start with local tasks and calendar views before connecting iCloud / Google / CalDAV
- Vault sync: make one device work first, then follow the sync guide to connect Koofr WebDAV or S3-compatible storage
- MCP / Skill: configure them after you understand your vault structure
- Custom PARA folders: learn from the example vault before changing the structure
5. Start using your own notes
After the example vault makes sense, choose one path:
Do not optimize the folder structure on day one. First make daily capture easy, make tasks visible, and review projects regularly. Refine the structure after that.
Common questions
I opened it, but I cannot see the example folders
You probably selected the wrong folder. Open the inner LifeOS Pro PARA Vault folder, not the parent folder created by extracting the zip.
Can I delete .lifeos or .obsidian?
Do not delete them. .lifeos stores Aino's vault settings, and .obsidian stores Obsidian-compatible settings. They are hidden folders; keep them in place.
Do I need to understand PARA first?
No. Use this simple rule: projects have deadlines, areas are ongoing responsibilities, resources are references, and archives are inactive items.
Next steps
- Usage — choose the right starting path for your situation
- Sync Your Aino Vault (Experimental) — use the same vault on desktop and mobile
- Open the Example Vault — practice with a complete sample
- Configuration Guide — review all settings when you need them
- Task Management — collect tasks from notes
- Theme Notes — understand how projects, areas, and resources collect related content